Halloween is over (did you see the crazy Halloween wreath I made?!), which means Christmas is almost here and many of us are ready to decorate! I promise not to decorate before Thanksgiving, but I can’t say the same for my husband or the neighbor down the street whose Christmas tree is up and lit! However, I do want to share the steps for creating a DIY Burlap Christmas Garland – you’re going to love it!
I prefer my holiday decor to be minimal, yet pack a punch. I like to focus on a few main pieces or specific areas around the house and then fill in the remaining space with a few accents here and there. With 3 young, rambunctious boys and a lunatic dog, I strive to keep decorations off the floor so they aren’t turned into weapons or dragged outside to be buried in the yard. Working within those perimeters, I’m drawn to wreaths, garland, lighting and anything else that can be hung.
We moved into a new house this summer that has a fireplace, yay! As a result, decorating for Christmas has become a lot more exciting and I decided to create a garland that will be used as one of the focal points. There’s only one place our tree can fit and that’s right next to the fireplace. It’s picture perfect – you know, that time right before the boys are jacked up on hot chocolate, coming apart at the seams to open presents, and the living room is trashed.
DIY Burlap Christmas Garland
There is no sewing required to create this Christmas garland. For the record, I haven’t learned to sew except for the occasional hole or lost limb of the “oh-so-many-favorite-stuffies” that don’t pay rent to live at our house. You don’t even need hot glue to make the garland, just scissors!
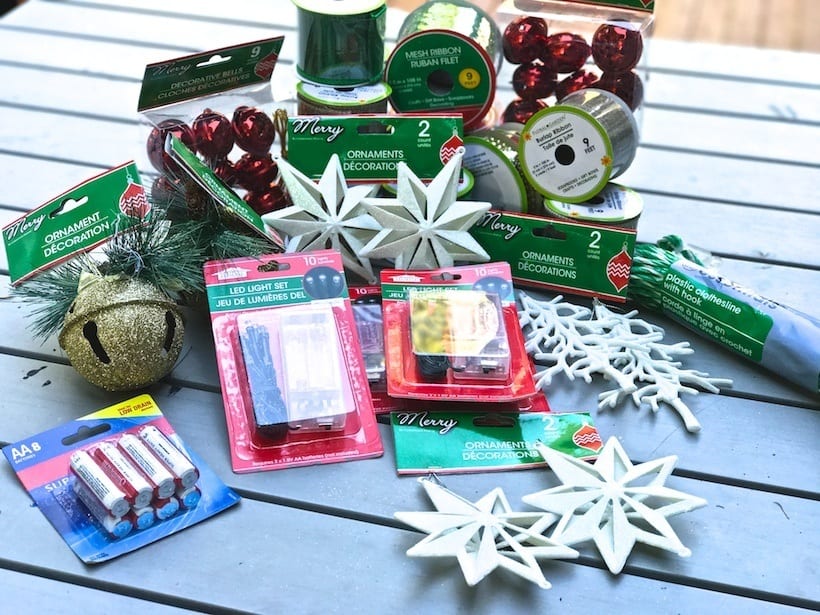
The main supply is ribbon, lots of ribbon. I used wired burlap on my garland so when it’s pulled out of storage every year it can be reshaped like an artificial tree. Believe it or not, I challenged myself to make the entire garland from dollar store supplies and I succeeded! All of the supplies on the list below were purchased from the Dollar Tree (contains affiliate links). I’ve noticed their supply of burlap ribbon is limited, but as an alternative, Michael’s or Amazon has a much larger selection of wired ribbons.
Supplies
- Plastic clothesline
- 21 rolls of green and brown burlap ribbon (2 in. x 108 in./ 3 yards)
- 6 rolls of red mesh ribbon (2.5 in. x 108 in./ 3 yards)
- Decorative bells (1 or 2 packs)
- 2 large gold bell ornaments (I cut the artificial greenery and bows off of mine.)
- 1 roll of brown raffia ribbon (0.2 in. x 30 ft.)
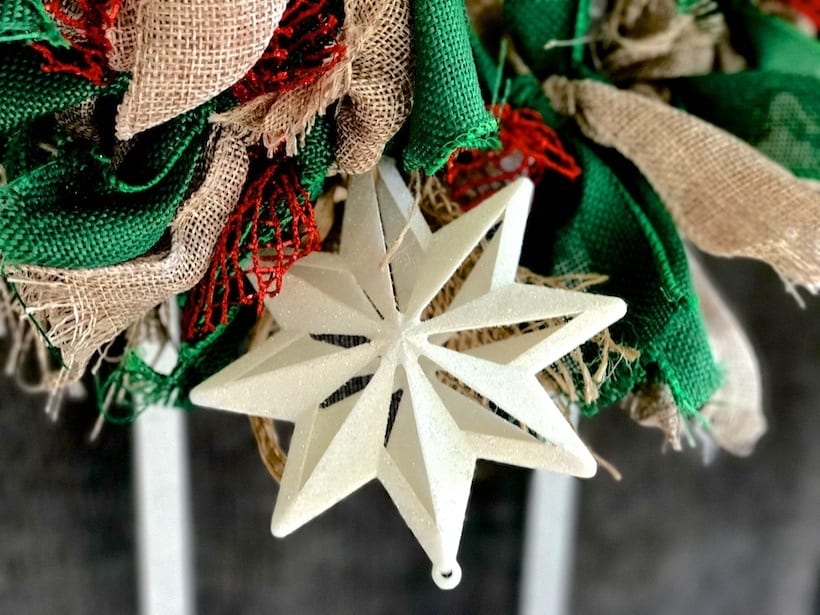
- White plastic star ornaments (3)
- 4 strands of red battery operated lights
- Command hooks (these would be awesome for hanging stockings from the fireplace instead of nails or heavy stocking hangers)
** The overall amount of ribbon in length is around 81 yards for a 10 foot garland. Depending on the width of your ribbons, your garland can also be wider and more voluminous if you choose.
Step 1: Measure & Prepare
- Keep in mind that my garland is a little over 10 feet long. Decide if you want the garland to be on your mantle, stair railing, over a door, or possibly draped over a window. Measure your space and adjust the amount of supplies as needed.
- Once you’ve determined the length you need, cut your clothesline accordingly. I suggest cutting it about a foot or so longer than what you measured in case you decide it’s too short later on. As I worked, I stopped a few times to hang the garland to see if the length was right.
- Pre-cut your ribbons. Each piece can be anywhere from 6 to 8 inches long – this does not have to be exact.
- Decide on a pattern of colors. I alternated between green and brown and added the red mesh after every third green.
Step 2: Start Tying
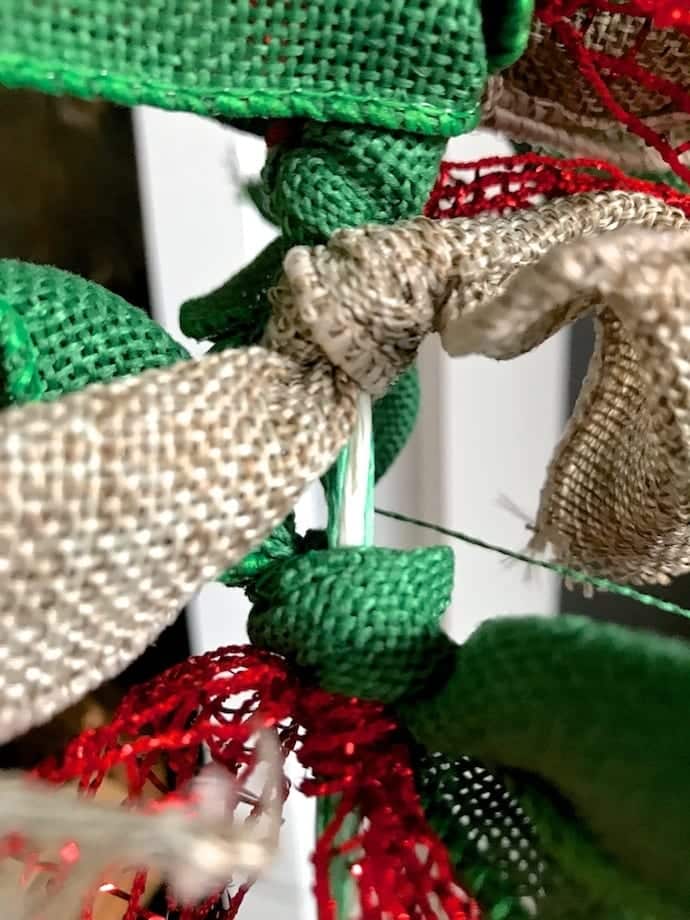
- Start tying your ribbons onto the clothesline, making sure to slide them together tightly so the clothesline doesn’t show through. I didn’t have to knot my ribbon, just one tie was enough.
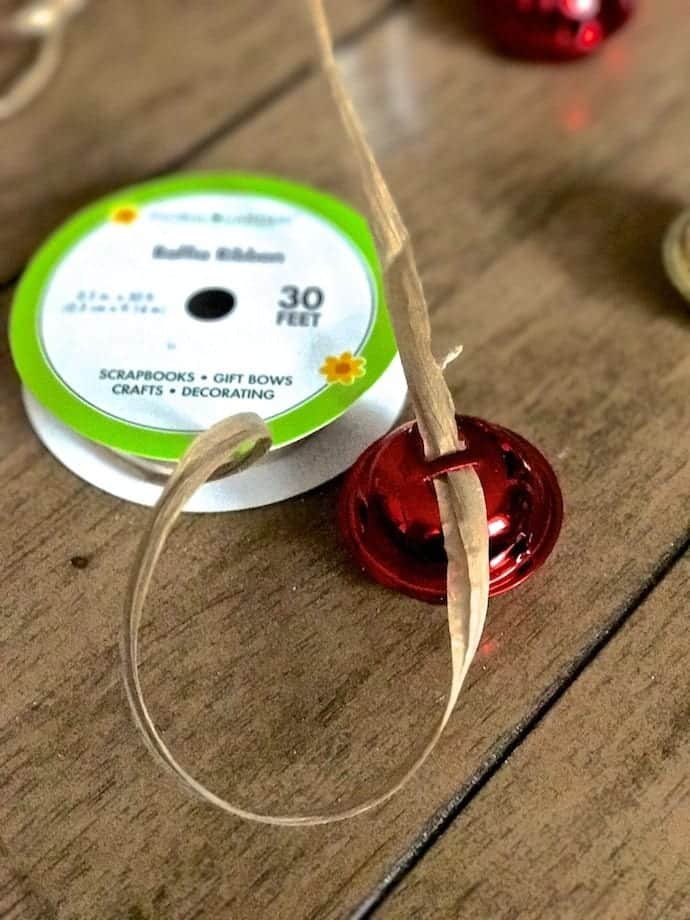
- When you’ve knotted enough ribbon to create your desired length, decide where the decorative pieces should go. This part is where the raffia ribbon comes in. The ribbon acts a little like a trash bag tie and will be used to secure the decorative ornaments in place. You can purchase any type of decorative ornaments that suit your fancy, just be sure they are light weight – the garland may start to get too heavy otherwise.
Step 3: The Bells and Whistles!
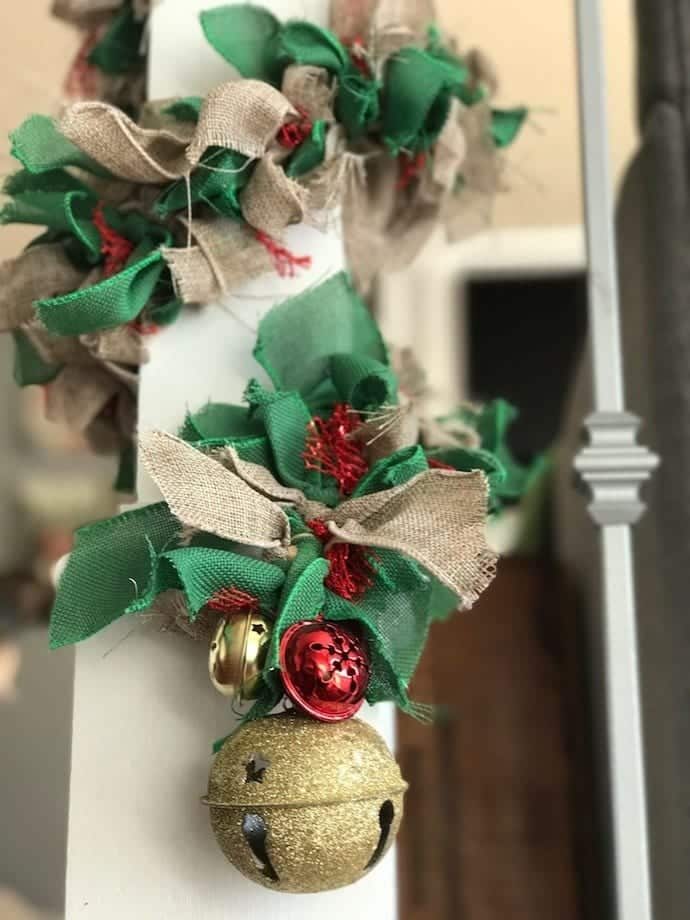
- At both ends of the garland, I tied three small bells to the top of a large golden bell with a long piece of raffia. To secure it, simply wrap the raffia around the last couple burlap ribbons and tie it tight. Be sure to cinch the raffia ribbon tight so the ornaments don’t dangle too loosely.
- Next, you can tie on additional ornaments. I tied a red and a gold bell together with one long piece of raffia and then attached them to the garland. I also attached the white stars. The raffia ribbon has the same rustic flare as the burlap, so there is no need to trim the excess. I did go back and trim down the red mesh ribbon because it seemed to overpower the piece when I just wanted to add in some sparkle.
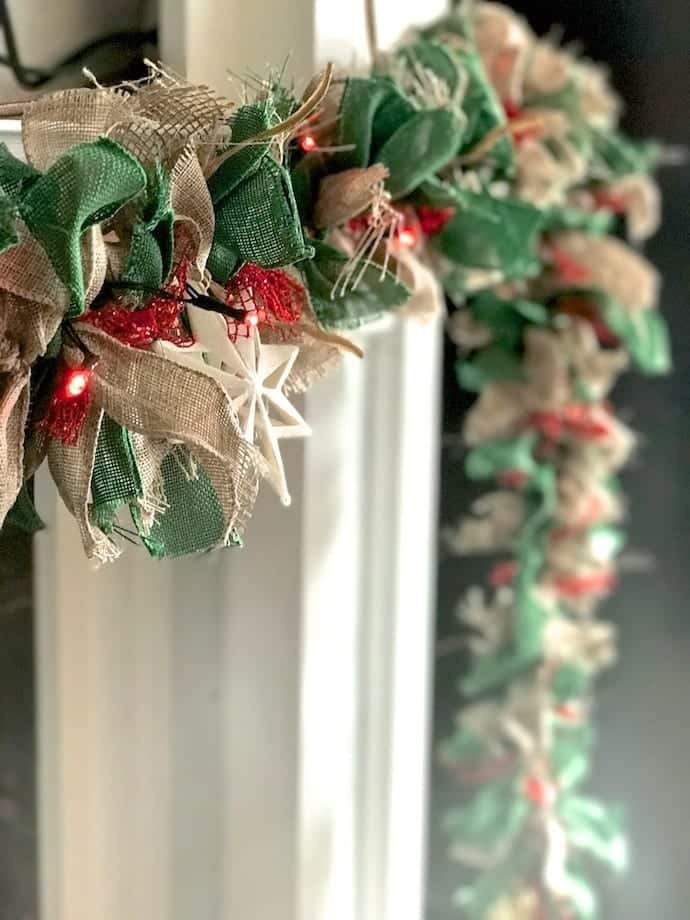
- Once you have completed your garland and hung it in place, add the strands of lights if you wish. Use the raffia once again to attach the battery pack and the other end of the light strand.
Between the plastic clothesline, the wire in the ribbon, and the raffia, the entire garland is very easy to shape. I’ve seen people use a strand of lights instead of a clothesline (how genius), but I wonder what happens when the lights die! I have never been successful at finding the one light causing the entire strand to go out, but I can replace batteries!
After this project, I think I may be addicted to ribbon! I want garland everywhere after seeing how this turned out. Have fun and post pictures of your garland on our FaceBook page so I can see what ribbon you chose. I think Joanna Gaines would be proud…
This post may contains affiliate links. If you make a purchase after clicking one of those links I will receive a small commission.


I absolutely love this and will be making my own thank you for sharing
HOORAY! Let us know how it comes out and share a photo with us on social.